
Last Updated: September 7, 2026
Low water pressure is a plumbing symptom with a handful of common causes, and most are fixable in under an hour. This guide walks through the diagnostic steps that separate a clogged faucet screen from a failing pressure regulator.
The first distinction, whether the problem affects one fixture or the entire house, cuts the list of possible causes in half.
Water pressure is the force pushing water through your pipes, measured in PSI, while water flow is the volume that actually comes out of the tap. (the EPA) Confusing the two leads homeowners down the wrong repair path.
Turn on a faucet and observe the stream. If water trickles out weakly but the pipe feels solid, you likely have a pressure problem. If the stream is thin but sprays with force, you have a flow restriction from sediment or a clogged component.
A single weak faucet points to a clogged aerator or faulty cartridge. Multiple weak fixtures suggest a supply line issue or main shut-off valve problem. Whole-house low pressure often traces back to the water pressure regulator, a failing well pump, or municipal supply issues.
Cleaning a faucet aerator is the fastest fix for low water pressure and should always be your first move. Mineral deposits and scale buildup collect in the small screen over time, choking the flow even when the rest of your plumbing is fine.
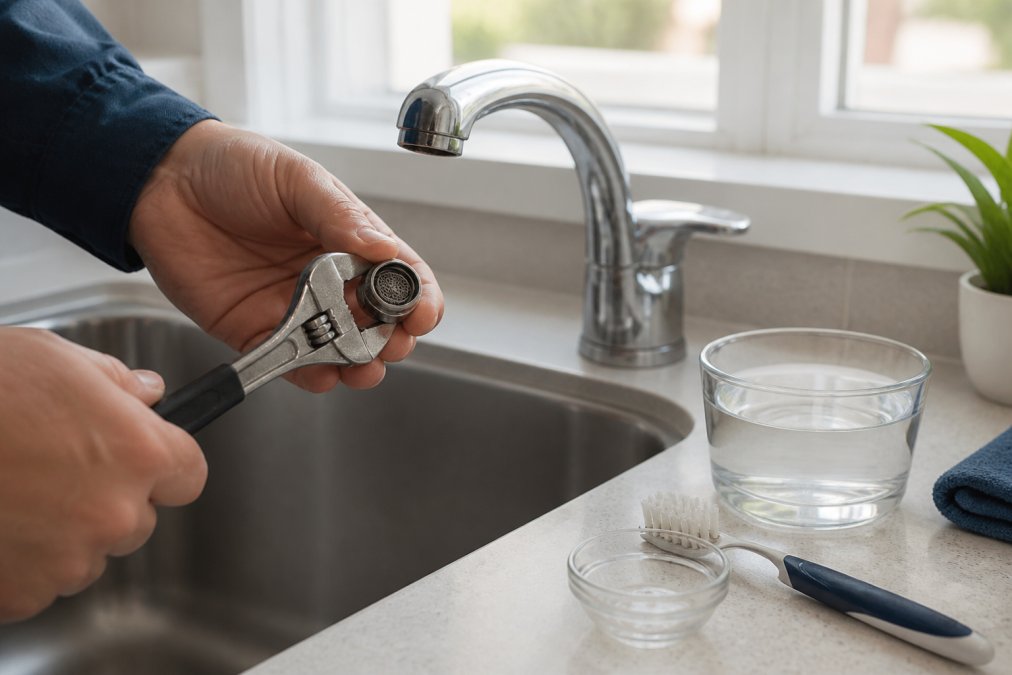
Follow these steps to clean a faucet aerator:
Showerheads follow the same logic: unscrew the head, soak it in vinegar overnight if buildup is heavy, and poke out clogged holes with a pin. If you have a water softener, check salt levels, as hard water accelerates scale buildup.
If cleaning aerators does not restore pressure, the next suspect is the main shut-off valve, often partially closed after recent plumbing work.
Locate the main shut-off valve near the water meter and turn it counterclockwise until it stops. A partially closed valve is a common cause of whole-house low water pressure, and the fix takes ten seconds.
Inspect visible supply lines for kinks, especially flexible braided hoses. Straighten any bends and check that shut-off valves under sinks are fully open, these are easy to bump halfway closed.
Gradual pressure loss over months points to sediment buildup or corrosion. A sudden drop signals an acute event, either a failure inside your home or a problem with your municipal supply. Determine which side of the meter the problem is on.
Check if the issue affects your neighbors. If the problem is building-wide or neighborhood-wide, the cause is almost certainly upstream of your property line.
If the issue is external:
If the issue is internal (only your home or unit is affected):
If the problem is isolated to your property, a hidden leak is the most likely culprit. Test for a leak using your water meter (with permission from your landlord if you rent):
If the meter test confirms a leak, you can narrow down its location before calling a plumber:
If you live in a multi-unit building, a sudden pressure drop can also be caused by a neighbor’s plumbing failure or by the building’s own pressure-reducing valve (PRV) failing. This valve, often located where the main water line enters the building, is the responsibility of the property owner, not the tenant. If you’ve confirmed the issue isn’t isolated to your unit’s fixtures, report it to your building manager immediately. Do not attempt to access or adjust the building’s main shut-off valve or PRV, that’s a code violation and a safety hazard in most jurisdictions.
Once you’ve ruled out a leak, the next suspect is a failing pressure regulator or a problem with your well system, which we cover in the next sections.
A water pressure regulator, also called a PRV, maintains consistent water pressure throughout your home. It looks like a bell-shaped device on the main water supply line, usually near where the pipe enters the house. If your pressure has dropped across every fixture, the regulator may need adjustment or replacement.
The water pressure regulator is a valve that reduces incoming municipal water pressure to a safe level for household plumbing, typically between 40 and 60 PSI. (hud.gov) Most fixtures and appliances are designed to operate within this range.
To adjust the regulator, locate the adjustment screw on top, often protected by a cap. Loosen the locknut, then turn the screw clockwise to increase pressure or counterclockwise to decrease it. Make small adjustments and test the pressure at a faucet after each turn. Use a pressure gauge attached to an outdoor spigot or washing machine valve for accurate readings.
When aerators are clean, valves are open, and the regulator is set correctly, the problem moves deeper into your walls. Leaks and pipe corrosion are the two hidden culprits that require more invasive investigation.
Pipe corrosion is the gradual deterioration of your water supply lines, which restricts flow and can contaminate your water. Galvanized pipes, common in homes built before the 1970s, are especially prone to internal corrosion that builds up over decades. If you have galvanized pipes and low water pressure throughout the house, repiping may be the only lasting solution.
EPA guidance on corroded plumbing and water quality explains how internal pipe corrosion affects both water pressure and water safety. Signs of corrosion include discolored water, a metallic taste, and visible rust on exposed pipes.
Leak detection follows a similar path. A hidden leak behind walls or under slabs not only reduces pressure but also causes structural damage and mold growth. If you suspect a leak, check for damp spots, unexplained water bills, and the water meter test described earlier. Professional leak detection services use specialized equipment to locate leaks without tearing open walls.
Homes on private wells face a separate set of low water pressure causes. If your water comes from a well, the pressure switch and pressure tank are the primary suspects.
The pressure switch controls when the well pump turns on and off. If the switch is failing or its settings have drifted, the pump may not maintain adequate pressure. The pressure tank stores water and maintains pressure between pump cycles. A waterlogged tank, one that has lost its air charge, causes the pump to cycle rapidly and pressure to fluctuate.
Check the pressure tank’s air charge by tapping it. It should sound hollow in the upper half and solid in the lower half. If it sounds full throughout, the bladder has ruptured and the tank needs replacement. This is a repair best handled by a professional, as it involves electrical connections and pressurization.
For homeowners who want to stay ahead of issues, smart home monitoring systems offer a proactive solution. Leak detectors placed near water heaters, under sinks, and around sump pumps send alerts to your phone the moment moisture is detected. Some systems include automatic shut-off valves that stop water flow when a leak is sensed, preventing damage while you are away.
Knowing when to stop DIY and call a professional is as important as knowing how to fix the problem. While cleaning an aerator is a safe weekend project, other repairs can cause thousands of dollars in water damage or violate local plumbing codes if done incorrectly. Here’s a clear framework for deciding when to pick up the phone.
If you’ve spent 30 minutes on basic diagnostics, checking aerators, opening shut-off valves, and inspecting supply lines, and pressure hasn’t improved, call a professional. Guessing can make the problem worse.
| Situation | Why You Need a Pro |
|---|---|
| Pressure drops in only one zone (e.g., all hot water, or all second-floor fixtures) | This points to a failing pressure-balancing valve on your water heater, a corroded branch line, or a problem with a specific manifold. These require specialized diagnostic equipment and often involve work inside walls. |
| You have galvanized pipes and pressure is dropping throughout the house | Internal corrosion in galvanized pipes (common in homes built before the 1970s) is a systemic issue. Repiping is the only lasting fix, and it’s a major project requiring permits and a licensed contractor. |
| The pressure regulator (PRV) adjustment screw is seized or the unit is over 10-15 years old | A failed PRV can cause pressure spikes that damage your water heater and appliances. Replacing it involves soldering or pressing new fittings onto your main line, which is not a DIY job for most homeowners. |
| You suspect a slab leak | A leak under your concrete foundation can cause settlement cracks and structural failure. Professionals use electronic leak detection equipment to locate the exact spot without tearing up your floor. |
| Your well pump is short-cycling (turning on and off rapidly) | This usually means a ruptured bladder in the pressure tank or a failing pressure switch. Both involve electrical connections and pressurization that can be dangerous. |
A good plumber performs a systematic diagnosis, which typically includes:
If you rent, your responsibilities and options are different.
Before you agree to any work, ask these questions:
For property owners in the Dallas-Fort Worth area, 308 Solutions Group offers 24/7 emergency plumbing services backed by over 45 years of experience, including water heater replacement. We also handle electrical repairs, generator installation, and surge protection across North Texas.
For most homes, 40 psi is on the low end of the acceptable range. Standard residential water pressure should sit between 40 and 60 psi. If your pressure gauge reads 40 psi or lower, you will likely notice weak flow from showers and appliances. Start by checking for simple clogs or a misadjusted pressure regulator. If your system reads below 30 psi, call a plumber to inspect for leaks or supply line issues.
Yes, a clogged aerator is one of the most common causes of low water pressure, especially if the problem is isolated to one faucet. Mineral deposits and sediment buildup collect in the small screen over time. Cleaning the aerator is a simple DIY repair: unscrew it, soak it in vinegar, and brush away debris. This often restores full flow without any other changes.
Signs of a failing pressure regulator include water pressure that fluctuates wildly, hammering noises in the pipes, or pressure that steadily drops for no clear reason. You can test it by checking the pressure gauge on a hose bib while someone runs water inside. If the pressure drops significantly, the regulator may need adjustment or replacement. A licensed plumber can confirm the diagnosis and handle the repair.
System-wide low water pressure usually points to a problem beyond a single faucet. Common culprits include a partially closed main shut-off valve, a failing pressure regulator, or sediment buildup in the water supply line. Homes on well systems may have a faulty pressure switch or pressure tank. Municipal supply issues can also be the cause, so check with neighbors to rule that out first.
Low water pressure is a fixable problem, but only when you diagnose it correctly. Start with the simple checks: clean your aerators, open your valves, and verify your regulator settings. When the problem runs deeper, trust a professional who can identify and resolve the issue without guesswork. Get started with 308 Solutions Group and restore your plumbing to full working order.
Electrical & Plumbing Licenses:
TECL: 33332 - TSBPE: M-40316